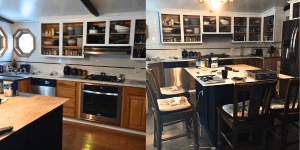
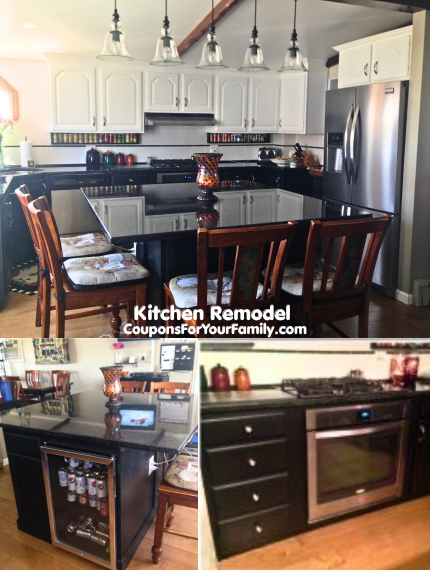
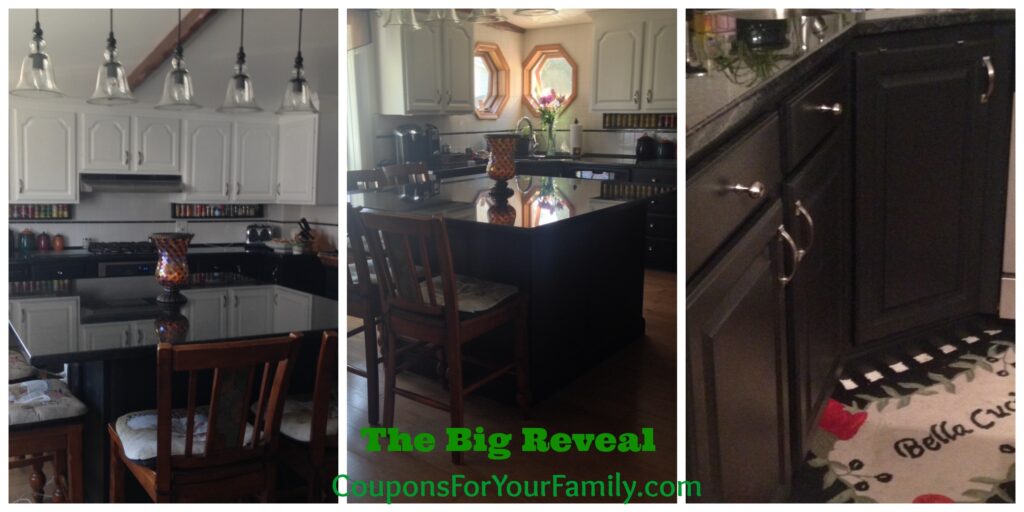
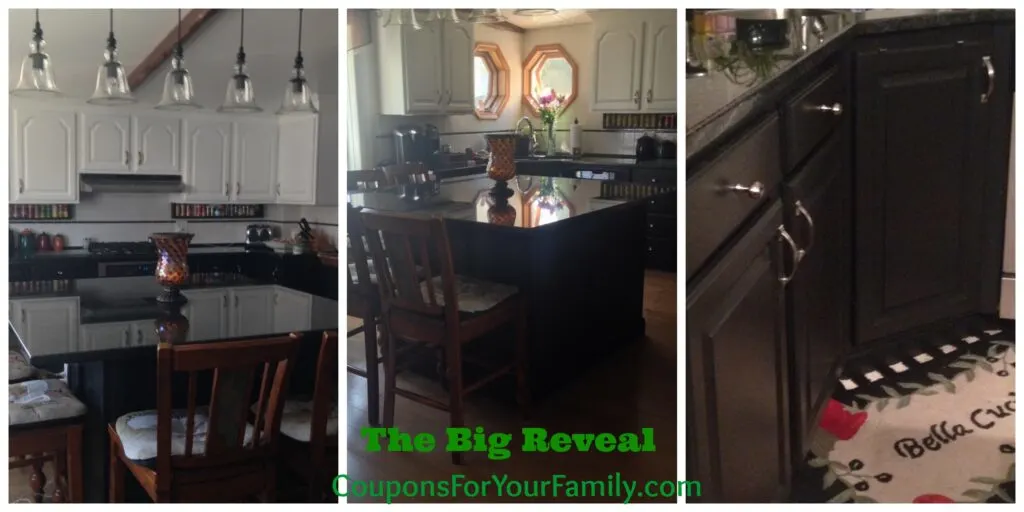
If your kitchen cabinets are solid oak but look dated, painting them can completely transform your space without the cost of replacing them. We used this exact method in our own kitchen makeover and saved thousands by updating the cabinets ourselves. The oak cabinets were in great shape, but the color no longer matched the updated floors and brighter look we wanted.
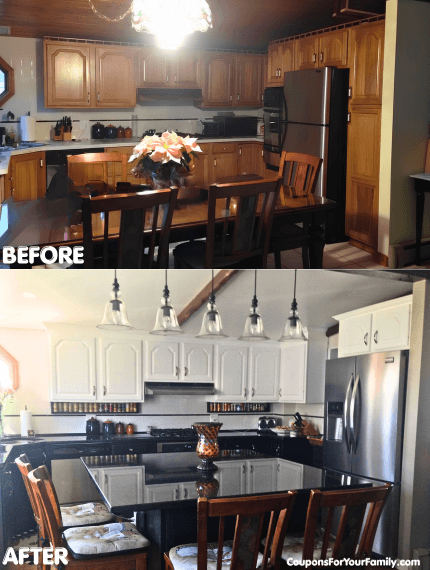
This post walks you through exactly how to paint oak kitchen cabinets, what worked, what I would do differently, and how to get a smooth finish without using a sprayer.
Can You Paint Oak Kitchen Cabinets?
Yes, you can—and it’s one of the best budget-friendly kitchen updates you can do. Oak has a strong grain pattern, so it requires proper prep and patience, but the results are absolutely worth it.
What to Know Before You Start
Before jumping in, here are a few important things:
- Oak grain will still show slightly after painting
- This is a multi-day project, not a quick fix
- Dark colors may require extra coats
- Dry time between coats is critical
Supplies You’ll Need
- Degreaser or TSP substitute
- Non-scratch Scrub pad
- Screwdriver (for doors & hardware)
- Painter’s tape & drop cloths
- Cabinet primer
- Cabinet paint (satin or semi-gloss)
- Angled paint brush
- Sanding block
- New cabinet hardware
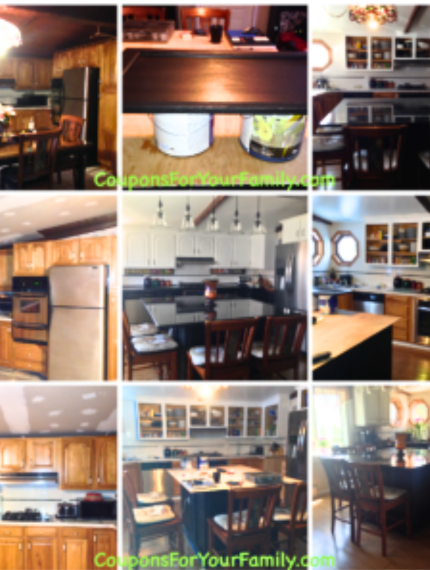
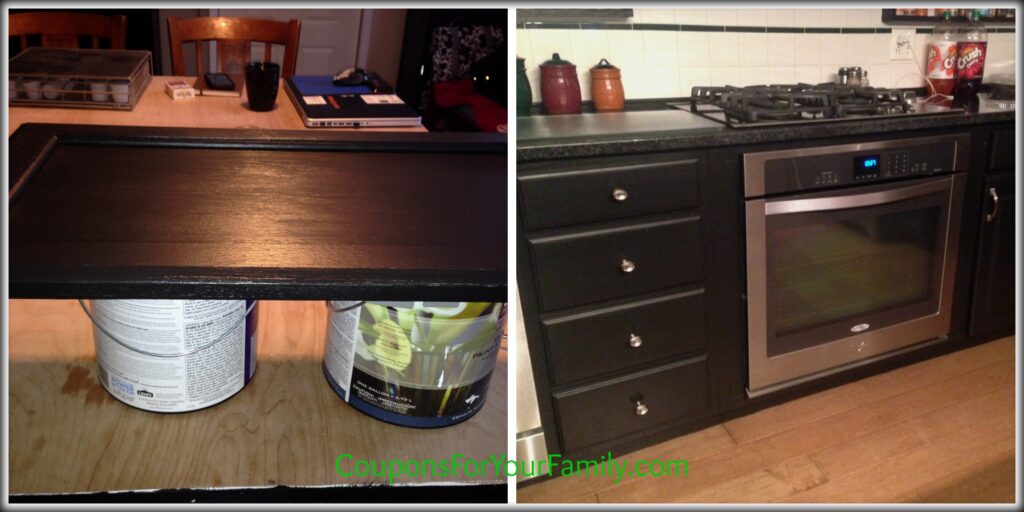
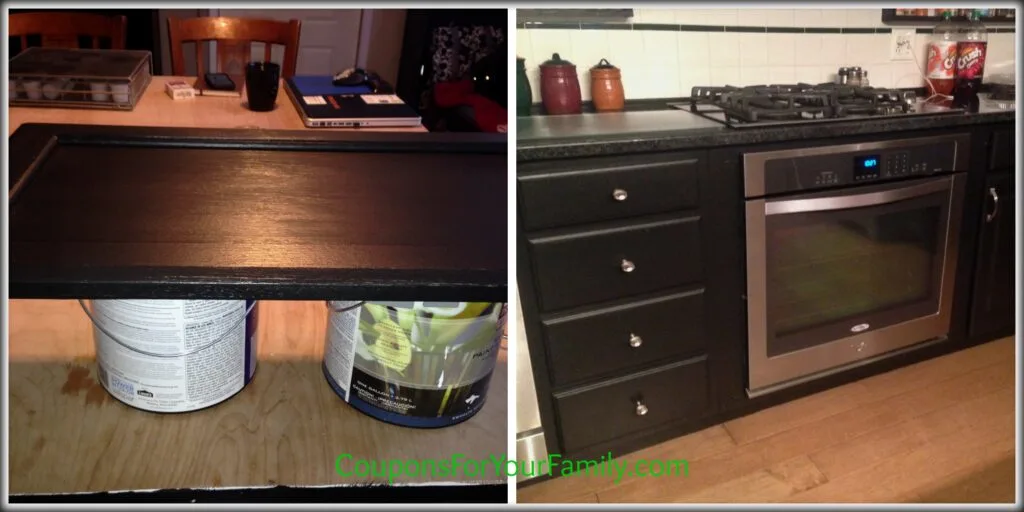
Step 1 – Clean the Cabinets
Cleaning is the most important step!
Kitchen cabinets build up grease over time, especially around handles. I used a degreaser and scrub pad to remove buildup and lightly dull the surface. Skipping this step will cause the paint to not adhere properly.
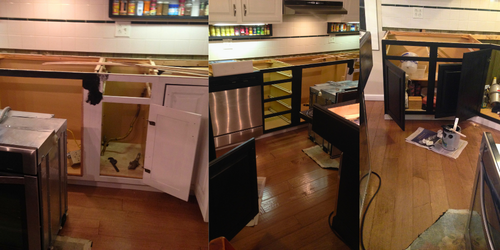
Step 2 – Remove Doors & Hardware
Take off all cabinet doors, drawer fronts, and hardware.
This makes painting easier and gives a cleaner, more professional finish.
Pro tip: Label each door so you know where it goes when reinstalling.
Step 3 – Light Sanding
Lightly sand glossy areas or rough spots.
You do NOT need to strip cabinets down to bare wood—just scuff the surface enough to help primer stick.
Step 4 – Prime the Cabinets
Apply a high-quality primer.
I brushed the primer on instead of rolling because it worked better into the oak grain and gave a more even finish.
If using dark paint, tinted primer will save time and improve coverage.
Step 5 – Paint in Thin Coats
For our kitchen:
- White uppers
- Black lowers
Use thin, even coats—don’t overload your brush.
Expect:
More coats for darker colors
2+ coats minimum
Step 6 – Let Paint Fully Dry
This is where most people mess up.
Do NOT rush drying time.
Even if it feels dry, it may still be soft underneath. Let each coat fully cure before adding another.
Step 7 – Reattach Hardware
Once everything is fully dry, reinstall doors and hardware.
This is also a great time to upgrade handles or knobs for a more modern look.
Cost to Paint Oak Cabinets
Our total cost was about $250 for:
- Paint
- Primer
- Hardware
Even with today’s prices, painting cabinets is still far cheaper than replacing them.
Mistakes to Avoid
- Skipping cleaning
- Applying thick coats
- Not allowing dry time
- Painting over grease or gloss
- Expecting grain to disappear completely
Is Painting Oak Cabinets Worth It?
Yes—if your cabinets are in good shape.
This is one of the best DIY projects for:
- Saving money
- Updating your kitchen
- Increasing home value
FAQ
Do I need to sand oak cabinets before painting?
Light sanding is recommended for best adhesion.
Can I paint cabinets without a sprayer?
Yes, brushing works great if done carefully.
Will oak grain show through paint?
Yes, slightly—but it still looks great.
How long does it take?
Typically several days depending on drying time.
If you’re thinking about painting your cabinets, this is one of the most budget-friendly ways to completely transform your kitchen.
Have questions about your project? Drop them in the comments—I’m happy to help!
Kitchen Sources + Budget Breakdown for other areas
Here’s a breakdown of the main items we used in our kitchen makeover. Prices may vary now, but this gives you a realistic idea of what to expect when planning your own update.
Lighting
Rustic glass 5-light pendant (similar to Pottery Barn style)
💲 Approx. $250–$350 depending on sales
Wall Oven
30” electric wall oven with convection (similar to Whirlpool Gold Series)
💲 Typically $1,200–$1,800 on sale
Refrigerator
Counter-depth French door refrigerator (similar to Frigidaire Gallery series)
💲 Around $1,800–$2,500 depending on promotions
Kitchen Island (DIY Build)
Made using unfinished stock cabinets from Home Depot
💲 Approx. $300–$600 depending on configuration
Granite Countertop for island and countertop – local granite shop
💲 Approx. $5000-$6000
Mini Fridge (Island)
Beverage fridge similar to Haier
💲 Around $150–$300
Kitchen Faucet
Pull-down faucet similar to Delta Leland style
💲 Around $150–$250
Flooring
Hardwood flooring (Shaw Epic line – Autumn Ridge color) from Shaw Floors
💲 Varies by retailer and install method
Cabinet Crown Molding
Added for a more custom look
💲 Around $30–$100 depending on size
ATICA
Monday 20th of March 2017
Wow that looks amazing!Beautiful Kitchen Cabinets!
House Painting Auckland
Saturday 3rd of December 2016
When things need to be done yourself then why take help and spoil things so go through this article and find out what you can do to make things be done on time and paint them yourself.
Rob Sprague
Sunday 30th of October 2016
Wow! the after looks very nice! It looks wider and more modern. The dark colors before made it look quite gloomy and very old fashioned. Great job on the repainting. Looks amazing!
Tim Armstrong
Tuesday 11th of October 2016
What an excellent tutorial! Were your cabinets oak? Mine are maple so maybe I wouldn’t have to worry so much about the grain?
Joel
Tuesday 11th of October 2016
Looks great, have you ever used a paint sprayer? what are your thoughts on using a paint sprayer to pain cabinets?